Setting up JGame 3.3 (JRE or J2ME) with Eclipse 3.3
This is my first try at using Eclipse. I am going to try and see if I can
design a game in even less time using a nicely set up Eclipse project.
For this I have created a couple of ready-made Eclipse project directories
that you can
download here. Follow the instructions below and start game programming right
away!
As I get more experienced with Eclipse I may be able to further improve
the project setup.
Setting up JGame with JOGL, or both J2ME/JRE simultaneously,
is something for future development.
Setting up JGame JRE with Eclipse 3.3
- Ensure you have Eclipse with JDT (Java Development Toolkit) installed.
This setup has been tested with Eclipse 3.3, other versions may or may not
work.
- Download this ZIP file:
jgame-eclipse-sample.zip
- Start up Eclipse.
- Choose File -> Import.
- You will see the import wizard. Under the tab General
you will find the
option "Existing project into workspace". Click Next.
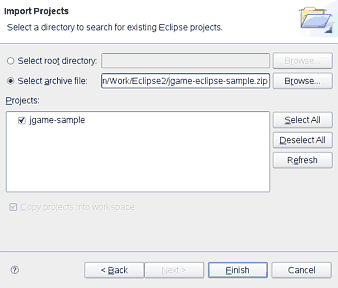
- Choose "Select archive file" and use browse
to select the ZIP you've just downloaded.
- Under Projects: you will see a project "jgame-sample".
Make sure the item is checked.
- Click Finish and you're ready to go!
|
 |
|
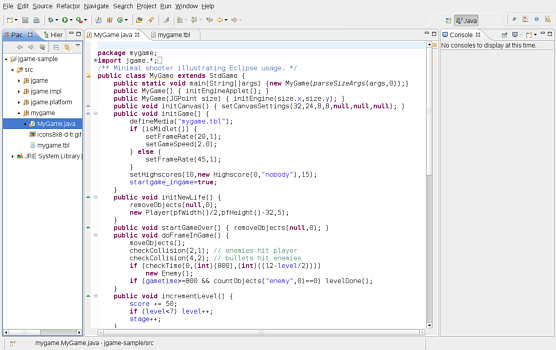
In the project you will see a sample game called MyGame in the package mygame.
A basic collection of sprites is available that you can use for creating
a prototype game.
Press Ctrl-F11 to compile/run the game.
|
|
Setting up JGame J2ME with Eclipse 3.3
Here's a quick guide for installing EclipseME and setting up the project.
Alternatively, see
the official EclipseME install instructions
for more info on installing EclipseME or special cases.
- Ensure you have Eclipse with JDT (Java Development Toolkit) installed.
This setup has been tested with Eclipse 3.3, other versions may or may not
work.
- Install a wireless toolkit, like
the Sun WTK 2.5.x.
-
Install Proguard
(not required but will seriously reduce Jar size).
- Download this ZIP file:
jgame-eclipse-sample-midlet.zip
- Start up Eclipse.
- Install EclipseME through the software updates system in Eclipse. See
these
instructions.
- Configure EclipseME in your workspace by following
these
instructions.
Note: the following steps are similar to steps 4-8 above
- Choose File -> Import.
- You will see the import wizard. Under the tab General
you will find the
option "Existing project into workspace". Click Next.
- Choose "Select archive file" and use browse
to select the ZIP you've just downloaded.
- Under Projects: you will see a project "jgame-sample-midlet".
Make sure the item is checked.
- Click Finish and you're ready to go!
Compile the project by right clicking on the project and selecting
J2ME -> build. Run the project by right-clicking on the MyGame class and
selecting Run -> as Emulated Midlet.
|